
Photography is the art of capturing light. Exposure refers to how much light is allowed to hit the camera sensor or film, shaping the image’s brightness and quality. To fully control your images, you need to master three critical elements: ISO, shutter speed, and aperture. These components work together as the “exposure triangle,” determining how light is captured and how the final image appears.
In this guide, we will delve into these fundamental concepts, explain their roles, and offer tips for effectively balancing them to achieve optimal exposure. By the end, you’ll understand how ISO, shutter speed, and aperture interact to create the images you envision.
What is Exposure?
Before diving into the individual elements, let’s define exposure. In photography, exposure is the amount of light that reaches your camera’s sensor or film, affecting the brightness of your image. If too much light is allowed in, the image will be overexposed (too bright). Conversely, too little light results in underexposure (too dark). Proper exposure ensures that the image is neither too light nor too dark, but perfectly balanced.
The three key settings that control exposure are:
- ISO: Controls the sensitivity of the camera sensor to light.
- Shutter Speed: Determines how long the sensor is exposed to light.
- Aperture: Governs the size of the lens opening that lets light into the camera.
These settings must be in harmony to produce the desired image.
ISO: Light Sensitivity
ISO refers to how sensitive your camera sensor is to light. In the days of film photography, ISO was a rating for film’s sensitivity to light. In digital cameras, ISO performs the same function for the sensor.
- Low ISO (e.g., 100-400): The sensor is less sensitive to light, which is ideal for bright conditions such as daylight.
- High ISO (e.g., 1600-3200 and above): The sensor becomes more sensitive, allowing you to shoot in low-light environments.
How ISO Works
When you increase ISO, the camera amplifies the sensor’s signal, allowing it to capture more light. However, this increase comes with a trade-off: noise. Noise refers to grainy distortions in the image, which reduce sharpness and detail. Higher ISO settings introduce more noise, which can impact image quality.
When to Use Low ISO:
- Bright outdoor settings
- To achieve the highest image quality
- When using a tripod for long exposures
When to Use High ISO:
- Low-light conditions (e.g., indoor photography, night scenes)
- When you need a faster shutter speed to avoid motion blur
ISO and Exposure
If you are shooting in low-light conditions and can’t change your shutter speed or aperture, increasing ISO can help maintain proper exposure. However, always aim to use the lowest ISO setting possible to avoid unnecessary noise.
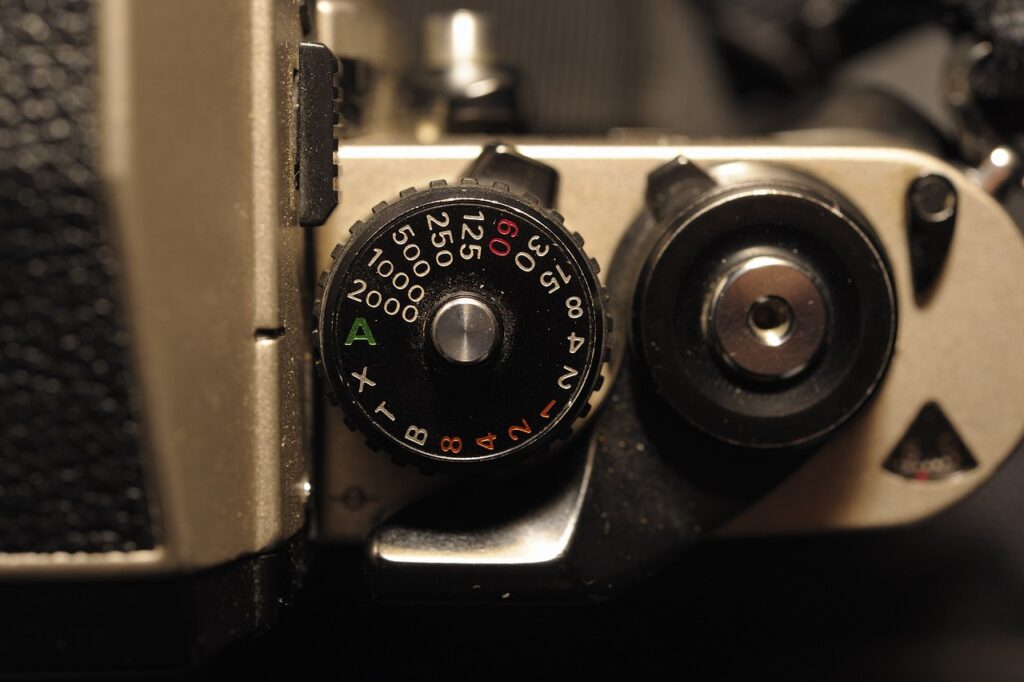
Shutter Speed: Controlling Time
Shutter speed refers to how long the camera’s sensor is exposed to light. Essentially, it is the amount of time the shutter remains open. It is measured in fractions of a second, such as 1/500, 1/250, or even full seconds.
- Fast shutter speed (e.g., 1/1000): Ideal for freezing motion, such as in sports photography.
- Slow shutter speed (e.g., 1/30 or slower): Useful for capturing motion blur, such as in landscape or night photography.
How Shutter Speed Works
A faster shutter speed reduces the amount of light reaching the sensor because the shutter is open for a shorter duration. Conversely, a slower shutter speed lets more light in, which is useful for low-light situations.
When to Use Fast Shutter Speed:
- Capturing fast-moving subjects (e.g., wildlife, sports)
- When hand-holding the camera to avoid camera shake
- Freezing action or movement
When to Use Slow Shutter Speed:
- Creating motion blur (e.g., waterfall or light trails)
- Night photography or low-light situations (with the use of a tripod)
- Capturing the feeling of movement
Shutter Speed and Exposure
Shutter speed has a direct impact on exposure. A fast shutter speed requires more light, which means you’ll need a wider aperture or higher ISO to maintain proper exposure. On the other hand, a slow shutter speed lets in more light, which can help in low-light conditions but requires a steady hand or a tripod to avoid blur.
Creative Uses of Shutter Speed
- Freezing Action: A fast shutter speed like 1/1000 can freeze a bird in flight or a soccer player mid-kick.
- Motion Blur: A slow shutter speed, such as 1/10 or lower, can create a sense of motion, such as blurred car lights at night or water flowing in a stream.
- Long Exposure: Extended shutter speeds (several seconds or more) are perfect for astrophotography or capturing star trails.
Aperture: Depth of Field Control
Aperture refers to the size of the opening in the lens through which light enters the camera. It is measured in f-stops (e.g., f/2.8, f/4, f/16). A smaller f-number (e.g., f/2.8) means a wider aperture, while a larger f-number (e.g., f/16) means a narrower aperture.
- Wide Aperture (e.g., f/1.4-f/4): Lets in more light and produces a shallow depth of field, where the subject is sharp, but the background is blurred (known as bokeh).
- Narrow Aperture (e.g., f/11-f/22): Allows less light in and produces a deeper depth of field, keeping more of the image in focus.
How Aperture Works
Aperture controls both exposure and depth of field. By adjusting the size of the lens opening, you control how much light reaches the sensor and how much of the scene is in focus.
When to Use a Wide Aperture:
- Portrait photography, to isolate the subject from the background
- Low-light environments where more light is needed
- To achieve a shallow depth of field and bokeh effect
When to Use a Narrow Aperture:
- Landscape photography, where you want the entire scene in focus
- Bright conditions, such as shooting in daylight
- To achieve a greater depth of field, keeping both foreground and background sharp
Aperture and Exposure
A wide aperture lets in more light, making it easier to shoot in low-light situations without raising ISO or lowering shutter speed. However, it also reduces depth of field, so you must consider your subject and background. A narrow aperture provides more depth of field but lets in less light, which means you may need to slow down the shutter speed or increase ISO.
The Exposure Triangle
The relationship between ISO, shutter speed, and aperture is often referred to as the exposure triangle. Each element affects the exposure of an image, and changing one requires adjustments to the others to maintain a balanced exposure.
- ISO affects image sensitivity and noise.
- Shutter Speed affects motion blur and light exposure.
- Aperture affects depth of field and the amount of light.
Understanding how these three settings interact is crucial to mastering exposure. Let’s explore this further.
Balancing the Exposure Triangle
Imagine you are shooting a portrait in low light. If you set your aperture to f/2.8 to blur the background, you’ll let in more light. However, you still need a fast shutter speed to avoid motion blur since your subject is moving. But if your shutter speed is too fast, not enough light will reach the sensor. To balance this, you could increase your ISO.
Here’s how you would adjust:
- Aperture: Wide to let in more light and create a shallow depth of field.
- Shutter Speed: Fast enough to avoid motion blur but not too fast to prevent underexposure.
- ISO: Increased to compensate for low light and fast shutter speed.
Each adjustment affects the others, so it’s a balancing act that depends on your creative intent.
Practical Scenarios and Tips
Let’s consider a few scenarios and how to approach them using the exposure triangle.
Scenario 1: Action Photography (Bright Conditions)
- Goal: Freeze motion.
- Settings: Fast shutter speed (1/1000 or faster), low ISO (100-200), and adjust the aperture accordingly (f/5.6 or narrower).
- Challenge: Too fast a shutter speed may underexpose the image. Open the aperture to compensate.
Scenario 2: Portrait Photography (Low Light)
- Goal: Isolate the subject with a blurred background.
- Settings: Wide aperture (f/1.8 or f/2.8), slower shutter speed (1/50 or 1/100), and higher ISO (400-800).
- Challenge: A higher ISO might introduce noise, so ensure proper exposure without over-relying on ISO.
Scenario 3: Landscape Photography
- Goal: Keep the entire scene in focus.
- Settings: Narrow aperture (f/11 or smaller), slower shutter speed (1/60 or slower), and low ISO (100-200).
- Challenge: With a narrow aperture, less light enters the lens, so use a slower shutter speed and a tripod to avoid camera shake.
Conclusion
Mastering ISO, shutter speed, and aperture is crucial for controlling exposure and achieving your desired photographic results. By understanding the exposure triangle and how these elements interact, you can capture images that not only reflect the scene but also convey your artistic vision.Whether you’re shooting fast action, portraits, or vast landscapes, balancing ISO, shutter speed, and aperture will enable you to adapt to any situation and create stunning images. With practice and experimentation, you’ll gain confidence in using these tools, transforming your photography from good to exceptional.
I love your blog.. very nice colors & theme. Did you design this website yourself or did you hire someone to do it for you? Plz answer back as I’m looking to create my own blog and would like to know where u got this from. thanks a lot
thank you so much.😀I’m glad you love the colors and theme 😊 I actually designed the website myself, it’s great to hear that the style resonates with you!
I have been surfing online more than 3 hours today, but I by no means found any fascinating article like yours. It is beautiful price enough for me. In my opinion, if all website owners and bloggers made excellent content as you probably did, the web will likely be a lot more useful than ever before.
Wow, thank you. It means a lot that my article stood out after hours of browsing. 😊 I’m really glad you found it fascinating always aiming to create something worth the read.